Independent buying guides for home air, water and safety.
As an Amazon Associate, Delozone earns from qualifying purchases.
Independent buying guides for home air, water and safety.
As an Amazon Associate, Delozone earns from qualifying purchases.


Pool ozone generators are reliable pieces of equipment, but like any mechanical system, they can develop issues. Knowing how to diagnose and fix common problems saves you the cost of a service call and keeps your pool water at peak quality. This guide covers every issue you are likely to encounter and the step-by-step fix for each.
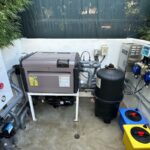
Parts and tools for fixing a pool ozone generator
Affiliate links: As an Amazon Associate, Delozone earns from qualifying purchases, at no extra cost to you. Full disclosure
Power issue: Check that the unit is receiving power. Verify the GFCI outlet has not tripped. Test the outlet with another device. If the generator is wired to a timer or automation system, confirm the timer is set correctly and the relay is functioning.
Depleted UV lamp (UV systems): UV lamps lose their ozone-producing wavelength (185nm) over time even if they still glow visibly. If the lamp is older than 12–18 months, replace it. This is the most common cause of zero output in UV systems. Cost: $30–$80.
Worn corona discharge cell (CD systems): CD cells degrade over 3–5 years. If the cell shows discoloration, pitting, or cracking, it needs replacement. Some units have a diagnostic mode that measures cell output, check your manual. Cost: $150–$400.
Internal fuse or circuit board failure: If the unit has power but does not activate, an internal fuse or control board may have failed. Check for user-replaceable fuses first. If none, contact the manufacturer for warranty service or a replacement board.
Aging UV lamp or CD cell: Output degrades gradually before complete failure. A lamp or cell at 70% of rated output will not adequately treat your pool. Replace preemptively based on the manufacturer’s recommended schedule.
Humid feed air (CD systems): Corona discharge generators need dry air to produce ozone efficiently. If the air dryer desiccant is exhausted (check the color indicator), humidity enters the generation chamber and reduces output by 30–50% or more. Regenerate or replace the desiccant beads.
Restricted airflow: Check the air intake for blockages, insect nests, dust buildup, or kinked intake tubing. Clean or clear any obstructions.
Venturi suction loss: If the venturi injector is partially clogged or the pump speed is too low, ozone is not being drawn efficiently into the water. Clean the venturi and verify adequate flow. See Problem 4 below.
Tubing leak: Inspect all ozone tubing connections from the generator to the venturi. Look for cracks, loose barb fittings, or degraded tubing. Ozone destroys non-rated tubing quickly, if you see crumbling, yellowed, or brittle tubing, replace it with PTFE, Kynar, or silicone ozone-rated tubing.
Failed check valve: The check valve between the generator and venturi prevents backflow. If it sticks open or the seal is worn, ozone can leak from the connection points. Remove, inspect, and replace if needed. Cost: $10–$30.
Excess ozone production: Some generators have adjustable output. If set too high for your pool size, excess ozone that cannot dissolve into the water will off-gas. Reduce the output setting. If the unit is not adjustable, consider adding a degas vessel or extending the contact chamber.
Poor ventilation: The equipment area should have adequate airflow. Enclosed equipment rooms without ventilation will accumulate even small amounts of off-gassed ozone. Add ventilation or a small exhaust fan.
Clogged venturi: Mineral scale, calcium deposits, or debris can clog the venturi’s internal throat. Remove the venturi and soak in diluted muriatic acid or white vinegar for 30–60 minutes. Flush thoroughly and reinstall.
Insufficient flow velocity: Venturi injectors require a minimum flow rate to create the pressure differential that generates suction. If you run a variable-speed pump at low speed, the flow may be insufficient. Solutions: increase pump speed during ozone treatment hours, install the venturi on a bypass loop with a throttling valve, or install a smaller-diameter venturi that creates differential at lower flows.
Air leak upstream: A leak on the pressure side of the plumbing upstream of the venturi can disrupt the pressure differential. Check all fittings, unions, and valve connections between the pump and the venturi.
Venturi installed backward: Verify the flow direction arrow on the venturi body matches your water flow direction. Reversed installation creates pressure instead of suction at the ozone port.
This issue usually is not caused by the ozone system itself but by external factors that ozone cannot fully address:
Filter needs cleaning: Ozone micro-flocculates suspended particles, which means your filter captures more material than before. If filter pressure is high, clean or backwash. This is actually a sign the ozone is working.
pH out of range: pH above 7.8 causes calcium to precipitate out of solution, creating cloudiness. Test and adjust pH to 7.2–7.6.
High calcium hardness: In areas with hard water, calcium levels above 400 ppm can cause persistent cloudiness. Partial water replacement may be needed.
Undersized ozone system: If the generator cannot keep up with organic load, contaminants accumulate and cause turbidity. Verify your system is properly sized and running adequate hours.
For a complete walkthrough, read our detailed guide on how to fix cloudy water in ozone pools.
This is a critical issue that can destroy the generator. Water has entered the tubing due to:
Failed check valve: The check valve has failed to seal, allowing water to siphon back from the venturi into the tubing and potentially into the generator. Immediately turn off and disconnect the generator. Replace the check valve. Inspect the generator for water damage before restarting.
Generator mounted below water line: If the generator is physically lower than the pool water level, gravity can siphon water back through the system. Remount the generator above the water line or add a Hartford loop (a U-shaped tubing loop that rises above the water line before descending to the venturi).
No check valve installed: If a check valve was never installed, add one immediately. This is a mandatory safety component.
You are using non-ozone-rated tubing. Standard vinyl, PVC, or rubber tubing cannot withstand ozone exposure. Replace with PTFE (Teflon), Kynar (PVDF), or silicone tubing rated for ozone service. These materials resist ozone degradation for 1–3 years under normal conditions.
Check that all barb fittings and connectors are also ozone-compatible. Some rubber O-rings and gaskets degrade similarly, replace with Viton or EPDM alternatives.
Ozone not reaching the water: The generator may be producing ozone, but a venturi clog, disconnected tubing, or failed check valve may prevent it from entering the plumbing. Verify ozone is actually being injected.
Insufficient contact time: If the venturi is too close to the pool return, ozone does not have enough time to react with contaminants before entering the pool and off-gassing. Relocate the injector further from the return to increase contact time (minimum 2–4 minutes).
Pool demand exceeds system capacity: If bather load, debris, or algae have created an enormous oxidation demand, even a properly sized system may struggle temporarily. Perform a chlorine shock to reduce the backlog, then let the ozone system maintain from there.
Most ozone generator problems are preventable with regular maintenance. Follow the schedule in our complete ozone pool maintenance guide.
For help choosing a reliable system from the start, see our best pool ozone generators comparison.
The Delozone Editorial Team researches water treatment, pool and spa, and indoor air products for independent buying guides. We compare products using manufacturer specifications, certification listings such as NSF/ANSI, UL, AHAM and Energy Star, published third-party test data and verified owner feedback. We do not sell products, and affiliate commissions never decide what we recommend.